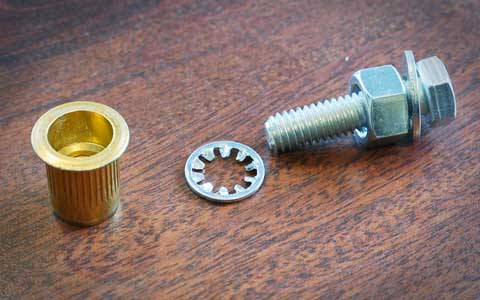
Have you ever faced the challenge of installing nuts but didn’t have the right knowledge? Are you searching for a secure and reliable connection without the expense of specialized equipment? This guide will take you through the step-by-step process of installing these tools using readily available items.
Essential Considerations Before Installing
Before installing a blind or rivet nut, ensure you have the correct size and type for your project. Verify that the material thickness and the load requirements are compatible with the blind nut. Ensure the drilling equipment is accurate and suitable for its dimensions. The following list depicts the essential factors to be considered while installing:
- Material compatibility with the tool’s specifications
- Correct drill bit size and type
- Alignment of it with the hole
- Load-bearing capacity and installation requirements
Selecting the Right Fastener
Choosing the correct option is essential for a successful installation. Select one that matches the hole diameter you plan to drill. Consider the material thickness and the type of load that it will bear. Ensure that it is compatible with the bolts or screws you will be using.
Preparing the Surface
Before you start, ensure the surface where you install the fastener is clean and smooth. Debris and rust can interfere with installation, leading to weak connections. Use sandpaper to clean the area, then mark the spot where the rivet nut inserts. Proper preparation is crucial for achieving a stable and reliable installation.
Drilling the Hole
The first step in installing this fastener is to drill a hole with the appropriate diameter. Select a drill bit that matches the nut’s outer diameter. Drill slowly and steadily to avoid enlarging the hole, which can cause the tool to fit loosely. Once the hole is drilled, ensure it is smooth and free of any burrs.
Inserting the Nut
With the hole prepared, carefully insert the fastener, ensuring a snug fit. Also, ensure it is aligned correctly and fits snugly in the hole. Press the tool firmly into place, applying consistent, even pressure to ensure a secure installation. It should be flush with the material’s surface.
Securing the Fastener
Use a bolt and a washer to secure the fastener without special tools. Place the bolt through the blind nut and add a washer on the opposite side. Tighten the bolt until it is firmly seated in the hole. The washer helps distribute the pressure evenly, ensuring the fastener is installed securely.
Testing the Installation
Once you have tightened the bolt, test the installation by threading a screw into the fastener. Ensure that the screw fits snugly into it and turns smoothly without resistance or wobbling. This is crucial for verifying that the nut is seated correctly and provides a reliable threaded connection.
Troubleshooting Common Issues
If you encounter difficulties during installation, check for common issues like oversized holes. Recheck the hole’s diameter to see if the fastener spins freely or does not hold securely. Adjust to ensure it fits snugly and securely in the drilled hole. Here is why you should always troubleshoot the issues:
- Improves Installation Accuracy: Ensures the fastener is aligned correctly for a secure fit.
- Enhances Reliability: Fixes issues like misalignment or loose fittings to prevent future failures.
- Reduces Rework: Addresses problems early to minimize the need for additional adjustments or repairs.
- Increases Longevity: Correct installation errors by Ensuring the blind nut performs well over time.
- Saves Time: Quickly identifies and resolves issues, speeding up the installation process.
- Boosts Safety: Prevents potential hazards caused by improper installation.
Therefore, following the steps above will help install a rivet nut without needing specialized tools. This approach saves you time and money and empowers you to handle DIY projects easily. Remember to purchase your fasteners from reputable shops to ensure quality.


