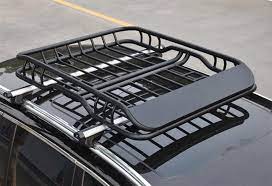
When it comes to optimising your vehicle for outdoor adventures or work-related tasks, installing a UTE roof rack can be a game-changer. Whether you’re a weekend warrior hauling camping gear or a tradesperson transporting equipment, a sturdy rack adds versatility and convenience to your vehicle. However, proper installation and maintenance are paramount to ensure the longevity and safety of your investment.
Choosing the Right Rack for Your Needs
Before diving into installation tips, it’s essential to select the right roof rack for your specific requirements. Racks come in various styles and configurations, including crossbars, platforms, and baskets. Consider factors such as the type of cargo you’ll be carrying, the frequency of use, and your vehicle’s make and model. Additionally, assess the weight capacity to ensure it can support your intended load. Whether you’re transporting bikes, kayaks, luggage, or construction materials, there’s a design tailored to your needs.
Once you’ve selected the appropriate rack, it’s time to focus on installation. While some may opt for professional installation, many are designed for easy DIY assembly. Follow these essential tips to ensure a secure and hassle-free process.
Read the Instructions Thoroughly
Before you start assembling your roof carrier, carefully read the manufacturer’s instructions. While it may seem tempting to dive right in, familiarising yourself with the installation steps and any specific requirements will help prevent mistakes and ensure proper installation. Pay attention to any special tools or hardware needed and gather them before you begin.
Clean and Prepare the Surface
A clean and well-prepared surface is essential for ensuring proper adhesion and stability. Thoroughly clean the roof of your vehicle, removing any dirt, dust, debris that could interfere with the installation process. If your rack attaches using adhesive pads or clamps, ensure the mounting area is dry and residue-free. This step is particularly crucial for vehicles with textured or uneven surfaces.
Measure Twice, Drill Once
If your carrier requires drilling for installation, precision is key. Take accurate measurements and mark the drilling locations according to the manufacturer’s specifications using a pencil. Double-check your measurements to avoid any expensive mistakes. Use a sharp drill bit appropriate for your vehicle’s roof material to ensure clean and precise holes. If you’re unsure about drilling into your vehicle, consider seeking professional assistance.
Distribute Weight Evenly
Once the roof rack is installed, it’s essential to distribute weight evenly across the crossbars or platform. Uneven weight distribution can strain the rack and potentially damage the rack and your vehicle. When loading cargo, place heavier items towards the centre of the roof to maintain stability and balance. Secure your load using appropriate tie-downs or straps to prevent shifting during transit.
Regular Maintenance and Inspection
To prolong the lifespan of your roof carrier and ensure continued safety, regular maintenance and inspection are crucial. Periodically check for any signs of wear, including rust, corrosion, or loose bolts. Tighten any loose hardware and replace any damaged components promptly. Additionally, clean the rack regularly to remove dirt, grime, and debris that can accumulate over time. A simple routine maintenance schedule can prevent minor issues from escalating into major problems.
Installing and maintaining a UTE roof rack is essential for enhancing the functionality and versatility of your vehicle. By following these essential tips, you can ensure a safe and secure installation process while prolonging the lifespan of your investment. Whether you’re embarking on outdoor adventures or tackling work-related tasks, a well-installed and properly maintained rack provides the peace of mind and convenience you need for any journey.


